
I love making goat butter. It's like a little science experiment in the kitchen that you can do in increments. If you're observant (and remember what you've observed), you can start to see patterns in the process. Each little homestead has its own method based on its goats, milking, and kitchen setup. But is it essential to have a separator to make goat butter?
Chill whole goat milk in mason jars in the fridge for about four days to make butter without a separator. The cold temperature causes the cream to rise to the top and form a cream line. Then, you can skim off the cream and freeze it. Once you have a pint of cream, you can make butter.
My kitchen is relatively small, so I don't have space for extra gadgets. Besides, the more machines you have, the more you must clean. If people could make butter before cream separators were invented, it must be possible. As it turns out, it's possible and easier than you think.
6 Steps To Making Goat Milk Butter Without A Separator

Step 1: Get Fresh Whole Goat Milk
If you have your own goats, you can milk them and refrigerate the milk as soon as possible. Additionally, the milk that comes out at the end of milking is usually the creamiest – so ensure you get that milk from the udder!

Step 1: Get Fresh Whole Goat Milk
You can purchase refrigerated or frozen goat milk from a store if you don't have dairy goats. Alternatively, you can ask friends or local farmers with dairy goats if they've got any milk spare.
Step 2: Pasteurize The Goat Milk (Optional)
Pasteurizing goat milk is optional. However, it is recommended if you're unsure if the milk was collected in a sanitary manner. Additionally, it's wise to pasteurize older milk to destroy excessive microbial growth.
Simply put, the process of pasteurizing is raising the temperature of the milk rapidly to a certain temperature, then cooling it rapidly. The process is relatively fast so that it kills microbes but doesn't cook or boil the milk.

Step 2: Pasteurize The Goat Milk
To pasteurize milk, you'll need a double boiler. If you don't have one, it's easy enough to create one using two pots. Here's how to pasteurize goat milk:
- In a large pot, boil some water.
- Next, place a smaller pot with the milk into the water, ensuring no boiling water spills into it.
- Continue boiling the water until the milk reaches 145 to 165 degrees Fahrenheit.
- Keep the milk heated at this temperature range for half an hour, stirring it occasionally to prevent it from burning at the sides or bottom of the pot.
- After half an hour, remove the milk pot and cool it in cold water or ice.
Step 3: Refrigerate The Goat Milk And Skim Off The Cream
Pour the goat milk into mason jars. Doing so will help the cream to thicken with a smaller surface area and more depth, making skimming easier.

Step 3: Refrigerate The Goat Milk And Skim Off The Cream
The longer you leave the goat milk in the refrigerator, the more it will separate. Some prefer skimming every one to two days, while others will wait a week to 10 days. A happy medium is to skim the cream off after four days.
If you bought frozen goat milk, you could allow it to thaw in the refrigerator. You might find the cream separates faster from the milk than it would if fresh.
You needn't cover the jars with whole milk while they are in the fridge. However, storing produce like onions or garlic alongside the milk is not recommended.
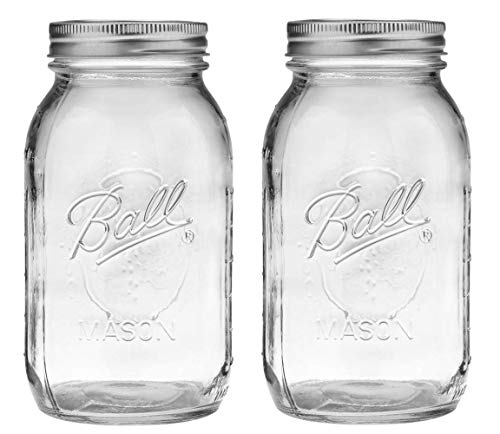
- 2-Regular mouth glass preserving mason jars. 2-Regular mouth lids. 2-Regular mouth bands.
- Ideal for sliced fruits and vegetables, pickles, tomato-based juices, and sauces.
- These jars are BPA-free. Dishwasher Safe and Reusable
- New and improved sure tight lids
- Helps keep canned food sealed now for up to 18-months
Different Ways To Skim Cream From Goat Milk
When you're ready to skim the cream, put it into a sterile jar with a tight cover or lid. This is because you might not have enough cream from the first few batches of milk. So you'll need to keep the cream refrigerated or frozen until you have about a pint of cream, adding to the jar whenever you skim.
But what is the best way to skim the cream from separated goat milk? You have a few options for the job, but the most straightforward way is with a large spoon.
Skimming Cream With A Ladle
To skim the cream using a spoon, you'll need to identify the "cream line." Using a clear jar will allow you to observe the slight difference in color and consistency between the top layer (cream) and the bottom layer (skimmed milk).
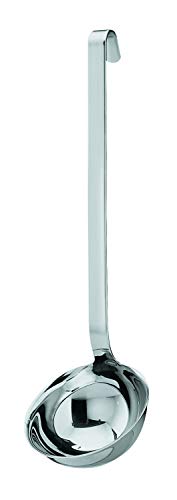
- Perfect for serving and pouring, the all -round pouring rim prevents drips
- Made of solid one piece 18-10 stainless steel each piece is 1/8" thick and feels balanced and substantial in the hand
- Designed in Germany, the ladle is 12.6" inches long and holds 5.4 ounces
- Ergonomically designed handles have a groove down the center for perfect finger placement, rounded edges for smooth handling
- Matte finish to reduce slippage and conceal finger prints
The thickness of the cream line will depend on the type of goat milk you're using. For example, Nigerian Dwarfs produce less milk, but the milk has a higher fat content. In comparison, La Manchas produce more milk but with a lower fat content.
- When using a spoon to skim the cream, gently immerse it into the cream line and allow it to fill the spoon. Avoid going below the cream line; otherwise, you'll scoop milk. Be sure to skim the cream gently, as vigorous movements will cause the cream to disappear into the milk.
- Pour the cream into the sterile jar.
- Continue gently scooping the cream until a thin layer is left on the milk (an inch or less).
- Tightly close the cream jar and place it in the fridge or freezer.
- Repeat this process with each whole, separated milk batch until you have enough cream to make butter.
Skimming Cream With A Turkey Baster
A turkey baster helps skim cream when the cream line is thin. To do so, you must immerse only the tip of the basting needle into the cream and suction it off. It's wise, however, to squeeze the bulb before dipping the needle to avoid making bubbles and disturbing the cream in the milk.
Squirt the cream into the sterile jar, close it tightly, and refrigerate or freeze it.
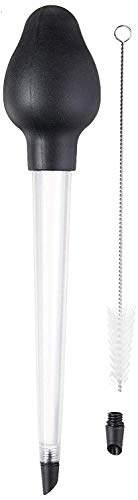
- ERGONOMIC BULB: silicone bulb squeezes easily to distribute liquid evenly. The round bulb sits comfortably in hand, and it’s small enough to slide into a drawer for storage. Squeeze the bulb to open the drip-preventing valve, then release to seal it. Large bulb is made of durable silicone, and the size accommodates taking in large volumes of meat drippings per squeeze.
- REMOVABLE DRIPLESS TIP: angled head ensures even distribution of juices, and it twists off for easy cleaning after use. Silicone mechanism inside the tip opens when the bulb is squeezed, then seals to prevent drips between pans. Keep counters clean while transferring drippings from the roasting pan to the dressing, gravy, or sauce. Baster comes with an additional tip in case of loss or accidental breakage.
- CLEAR CYLINDER: clear plastic cylinder allows you to see how much liquid is in the Baster at any given time for even distribution of drippings. Heat resistant for easy transfer of hot liquids.
- EASY CLEAN: brush included for easy cleaning; tip and bulb are removable for separate cleansing. All components are dishwasher safe.
- DIMENSIONS AND CARE: Measures 11.5" L x 2.25" W x 2.25" H. Dishwasher safe, food safe & BPA free.
Separating Milk And Cream Using A Lemonade Dispenser
Another way of separating the goat cream and milk is by using a refreshment dispenser. They come in various sizes, but a one- or two-gallon one is ideal.
- Fill the dispenser with whole goat milk and place it in the refrigerator for at least a day, preferably longer.
- When it's ready to separate, have two containers on hand: one for the milk and your sterile jar for the cream.
- Open the spigot and drain the milk into the milk container.
- When the milk layer is nearing its end, swap containers so the cream pours into the other jar.
- Seal and place the cream jar in the refrigerator or freezer.
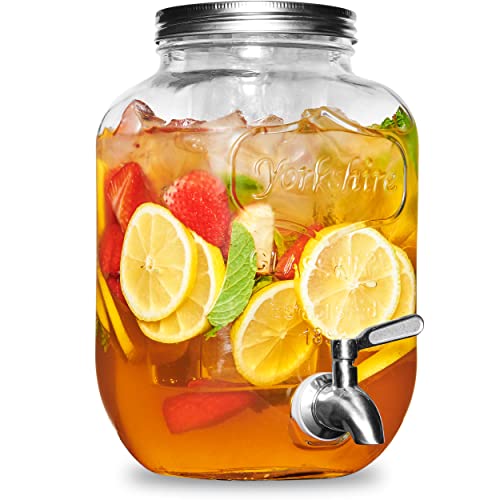
- PREMIUM GLASS - Constructed of premium-grade glass, the beverage serveware will be secure and balanced for indoor and outdoor use. The crystal-clear sides allow you to see colorful contents; the wide-mouth authentic mason jar design adds a majestic touch of decor.
- STAINLESS STEEL MESS-FREE SPIGOT - An 18/8-stainless spigot is affixed to these drink dispensers for parties. The spout is 100% leak-proof and drip-free while allowing for strong steady flow.
- STAINLESS STEEL LID - The glass water dispenser has a tin lid that keeps bugs or debris out of your beverages. For fresh lemonade, iced tea, infused water, punch, juices, and sangria.
- WIDE MOUTH - A specially designed wide mouth allows you to effortlessly infuse drinks with fruits or berries and makes it easy to hand-wash the punch dispenser for parties. Not dishwasher safe.
- PACKAGING & CARE - The juice dispenser arrives securely packaged and makes for an awesome, attractive gift. Note: NOT FOR HOT BEVERAGES. SIZE: 11 “H 7” W.
Step 4: Cool And Churn The Goat Cream
Once you've collected about a quart of goat cream, you can make goat butter. A quart of cream should yield about a cup of butter.

Step 4: Cool And Churn The Goat Cream
There are various ways to churn the cream, but what's important is that the cream and utensils should be as cold as possible. The reason is that the colder the cream, the better it separates into butter and buttermilk when churned.
You can churn the cream using a mixer, blender, or in the sealed jar it's already in (less messy and fewer dishes!). Depending on the amount of cream and the pace at which it is churned, you can expect butter to form after 15 minutes.
Here are a few considerations to remember when churning cream to make butter:
- You can use a blender on the low setting or a stand mixer with a paddle attachment.
- There will be splattering when the butter and buttermilk separate, so have a dish towel on standby.
- Whip it beyond the "whipped cream" stage until the butter "grains" begin to form and clump together.
- Turn off the mixer when the clumps begin to form.
- The colder the cream, the easier the butter-making process.

- HOMEMADE BUTTER | Make delicious, homemade butter with the Kilner Butter Churner. Simply place double cream into the glass jar base, attach the lid with the churning mechanism and turn the handle which starts to rotate the paddles. Continue to churn for around 10 minutes until the butter fat separates from the buttermilk. Strain away the buttermilk and shape the butter fat using the Kilner Butter Paddles. The buttermilk can be utilised for pancakes or scone mixtures.
- CONTENTS | This set includes one Kilner 1 litre jar, 1 Kilner Butter Churner/paddle and one recipe booklet.
- TAKING CARE | Please note this is handwash only, do not pour boiling water directly.
- SUSTAINABLE GLASS | Kilner glass is made from natural ingredients, ensuring no harmful chemicals or toxins can leak into your food. The glass is also BPA-free and does not absorb odours, flavours, or stains. Not only is glass a healthier option, but it is also made to last and never for single use.
- THE KILNER STORY | The original Kilner Jar, invented by John Kilner and Co. in England is as much loved and successful now as it was over 180 years ago.
Step 5: Drain The Buttermilk And Rinse The Butter
Drain off as much buttermilk as possible without losing any of the butter. Press the butter with a spatula against one side of the bowl to form a blob. Then, rinse the butter with icy-cold water until the water runs clear.
When the water runs clear, use a wooden spoon to press the butter against the side of the bowl to squash out additional water or buttermilk. Avoid handling the butter with your hands, as the heat will soften it and cause some to rinse off. Additionally, don't use warm or room-temperature water to rinse the butter.

Step 5: Drain The Buttermilk And Rinse The Butter
If you're going to add salt to your goat butter, now is the time. A pinch of fine sea salt should be sufficient for a cup of butter, although you can add more salt if you wish. Alternatively, you can skip the salt altogether.
What Can You Do With The Buttermilk?
Buttermilk is a byproduct of butter-making, but what can you do with it? You can drink buttermilk as a tasty treat after all your hard work. Alternatively, you can keep the buttermilk for baking (e.g., buttermilk rusks) or add it to your morning cereal instead of milk.
If you don't wish to consume the buttermilk yourself, you can give it to your chickens or pets as a delicious treat.
Step 6: Press The Butter Into A Mold And Refrigerate
Now that your butter is ready (whether salted or not), you can mold and refrigerate it. A ramekin is ideal if you're happy to keep the butter in a dish in the fridge. However, if you want to mold the butter, you can do that too. If you start with a pint of cream, you should have a half-pound of butter.

Step 6: Press The Butter Into A Mold And Refrigerate
Ensure the mold has been "seasoned" with regular use and rinsed with cold water before pressing in the butter. Once the butter has been pressed into the mold, refrigerate it for at least 15 minutes or until needed. Keeping the butter cool and covered is advisable to prevent it from spoiling. It will also help prevent the cat from licking it when you're not looking!
Additional Notes On Making Goat Milk Butter
Goat milk differs from cow milk in that it is naturally homogenized. The word homogenized means the cream is evenly distributed in the milk. Homogenizing cow milk means forcing it at high speed through a fine mesh to break apart the fat particles.
So, making goat butter from whole milk can take longer than making cow butter because you must wait longer for it to separate.
Next are some additional facts regarding goat butter and milk:
- Goat butter is not as yellow as cow butter as less beta-carotene is present.
- You can culture goat cream before turning it into butter. It will change the taste slightly, but the buttermilk will taste tangier.
- If you want to culture your butter, add kefir or a different culture to the cream before churning.
- Cream stays fresh in the freezer. So, you can add to your cream collection over time before making butter.
- You can increase the fat content in goat milk by feeding the goats more fiber. It is in the process of digesting fiber that goats produce fattier milk. You might not have to buy supplementary feed if they have enough grass, weeds, and foliage to enjoy.
Conclusion
Making goat milk butter without a separator requires that you have a fridge, some jars, and patience. You'd first need to wait for the cream to coagulate before skimming it off the skimmed milk. Then, churn the cream to get delicious goat butter and buttermilk. Yum!